Clothesline Cleaners has been recognized in the Dry Cleaner category as Idaho’s Best Silver and Best of Treasure Valley for 2026.
In addition we hold multiple advanced certifications through the Drycleaning & Laundry Institute (DLI), along with membership in the Association of Wedding Gown Specialists. The first and only 5x Certified in Idaho History.
Our goal is to provide best care in Idaho.
Why This Matters
Together, these represent community recognition and deep technical training.
Clothesline Cleaners goal is to be the best in garment care in the Treasure Valley and the community voted that we are the best in 2026!
Thank you for your loyalty and votes.
Sincerely,
David Escobar
Owner & Team Leader
CGCP, CED, CPD, CPW, AWGS
I’m proud to celebrate something big and meaningful for our clients.
Clothesline Cleaners now holds multiple advanced certifications through the Drycleaning & Laundry Institute (DLI), along with membership in the Association of Wedding Gown Specialists. The first and only 5x Certified in Idaho History.
Together, these represent deep technical training in:
• Garment Care Science & Techniques
• Professional Drycleaning & Wetcleaning
• Environmental Responsibility & Skill
• Advanced Wedding Gown Care & Preservation
We want to provide the best care in Idaho.
Why This Matters
When someone trusts us with a wedding gown, a custom suit, couture dress, heirloom bedding, or specialty fabric, there is no room for guesswork.
These certifications represent testing, continuing education, and a commitment to doing things the right way.
What This Means For You
✔️ Your garments are evaluated and cleaned by certified technicians
✔️ We understand both drycleaning and advanced wetcleaning systems
✔️ We operate with environmental responsibility
✔️ Wedding gowns are handled under nationally recognized preservation standards
✔️ We invest in education so your items are treated properly
Clothesline Cleaners goal is to be the best in garment care in the Treasure Valley.
These credentials simply reflect our deep commitment to you.
Thank you for trusting us with your most precious items that matter most to you.
Sincerely,
David Escobar
Owner & Team Leader
CGCP, CED, CPD, CPW, AWGS
At Clothesline Cleaners, we believe everyone deserves the chance to walk into a job interview with confidence. First impressions matter, and we know how much a freshly cleaned and pressed outfit can boost morale.
That’s why we’re offering free cleaning of one interview outfit for anyone currently unemployed and preparing for a job interview.
Whether it’s a suit, dress, or professional outfit, simply bring it to any Clothesline Cleaners location and let our team know it’s for an interview. We’ll make sure it’s returned to you, cleaned and ready to go.
This is our way of giving back to the Idaho Treasure Valley community that has supported us for so many years. We’ve seen how tough times can be, and we want to do our part to help local job seekers put their best foot forward.
Details to know:
No charge for one outfit cleaned for a confirmed job interview
Available at all Clothesline Cleaners locations across Boise and Meridian
Just mention it’s for an interview when you drop it off
We look forward to supporting you in your job search — and we’re cheering for your success!
Why We Built PureClean Flex
We didn’t set out to build another laundry service. We just wanted to solve a simple problem:
Laundry takes too much time. And nobody wants to deal with it.
That’s it. So we built something that works like you’d expect — no gimmicks, no fine print, no extra stress.
No Subscriptions. No Minimums. No Surprises.
PureClean Flex is simple:
You use it? It’s $29.99 per bag. You don’t use it? You pay $0. We pick it up, clean it, fold it, and bring it back. Each bag fits around 3–7 loads. No weighing. No tracking. Just fill the bag and set it out. If you need more bags, we’ll give them to you. They’re the same price. No extra fees.
Who It’s For
It’s for anyone who’s tired of laundry taking over the week.
Most of our Flex customers are working couples, parents, or people who just don’t want to fold another load of towels. There’s no contract. No pressure. No one chasing you about “membership tiers.” You use it when you need it. That’s it.
Why We Built It This Way
We kept hearing the same thing over and over:
“I want help with laundry, but I don’t want to commit to anything. I don’t want another bill. I just want it to disappear.”
So that’s what we built. A pay-as-you-go laundry service that doesn’t ask you to do anything extra. No apps. No logins. No complexity. You get time back, your laundry gets done, and you don’t have to think about it again.
For most of our customers, your dry cleaning experience looks simple: drop off, pick up, done. And that’s exactly how it should feel. But behind the scenes, dry cleaning is a highly detailed, fast-paced operation involving hundreds of moving parts—each one a potential failure point if not tracked, managed, and verified.
For years, we’ve worked hard to deliver consistent execution. But deep down, we knew: it could be even better. We were still relying too much on memory. Too much on great people trying to juggle too much complexity without the best systems to back them up.
And every once in a while, it showed.
A late piece. An order instruction processed incorrectly. Even if 99% of orders were done well, the 1% haunted us. So in December 2024 to early 2025, we made a decision: we were going to rebuild how we operate—not by patching holes, but by rethinking everything.
We Started with the Problem
The root issue wasn’t individual mistakes. It was system gaps. There were too many assumptions. Too many handoffs. Too much tribal knowledge. So we started mapping every single step of how an order flows—from the moment it’s received to the moment it’s returned.
What we found were dozens of pressure points where things could go wrong: Orders being manually sorted and mentally tracked by employees with no real audit trail, garments traveling between stations without confirmation of who handled what, or when. These weren’t signs of laziness. They were signs of a team doing its best without the tools it deserved. So we started building the tools.
The Scan Station Revolution
We expanded and restructured our scan stations. Previously, scans occurred mainly at item creation and final bagging—important steps, but not enough to fully capture the order’s journey. Now, scans happen at each key transition: check-in, cleaning, pressing, inspection, final assembly, and far beyond. Each scan records exactly where a garment is, who handled it, what stage it’s in, and how long it stayed there.
After final assembly, the scan process continues well beyond our production floor—linking every transition point between our plant and your hands. Orders move onto a designated Z-rail, then through a series of scanning checkpoints: staging areas, transit Z-rails, vans, store intake rails, and finally to the customer-facing rack. This full-spectrum scan system is helping us transform our operations from strong to near perfect. Its created the foundation for our relentless focus, the Perfect Order System: a traceable chain of custody for every order—improving visibility, tightening accountability, and giving our team real-time control across the entire business.
We enhanced our camera systems by installing high-resolution units directly at local workstations. While we’ve always had plant-wide cameras but they couldn’t tie specific actions—like when a garment was pressed or when an item was moved post-bagging—to a precise time or person. Now, each photo is linked to a timestamped scan, making it possible to visually verify what happened, when, and where—so that any concern or escalation is accompanied by visual confirmation, not assumptions.
We upgraded our plant equipment by installing new computers, monitors, and scanners. We also developed new internal reports and operational tools to give our teams clearer insight into how each order is progressing and where attention is needed most. Now, if something looks off, we can catch it early—before it becomes a disappointed customer, or a stressed-out team.
New Roles, New Structure
The tech mattered. But without the right people and new structure, it wouldn’t work. So we created a new team: Order Operations. Their job? Protect the flow. They monitor every scan and checkpoint. They spot delays, anomalies, or mismatches. They respond to issues before they escalate. They manage final quality control, ensuring every item is complete, correct, and fully verified. We also redefined internal accountability: every department knows where their responsibility starts and stops. No confusion. No gaps. No dropped handoffs. We added redundancy in the right places—not to slow things down, but to catch the rare edge cases that used to slip through.
Why This Matters
Because at the end of the day, our customers don’t care about scanners or dashboards. They care that their order is right and on time. That their preferences were remembered perfectly. That their items are handled with precision and consistency.
We built this system not for technology’s sake, but because we are obsessed with eliminating preventable mistakes. We believe in systems that protect the people doing the work—so they can focus on doing it well. It’s about earning your trust not once, but every single order. It’s about being able to answer questions before they’re asked—because the data, photos, and process give us total clarity. It’s about scalability: creating an operation where a surge in volume doesn’t mean a drop in system performance. It’s about professionalizing every inch of the workflow so no part of the operation depends on memory, assumption, or best guesses. And most of all, it’s about holding ourselves to a standard we know is higher than “really good.” We’re still continuing to refine it further each day to get further system improvements. And we’ll keep getting better—because behind every tag, every scan, and every camera frame is a team that cares too much to let “almost right” be good enough.
As we fully roll out this system, the statement guiding every decision we make is simple: Will this help to ensure a perfect order, every single time.
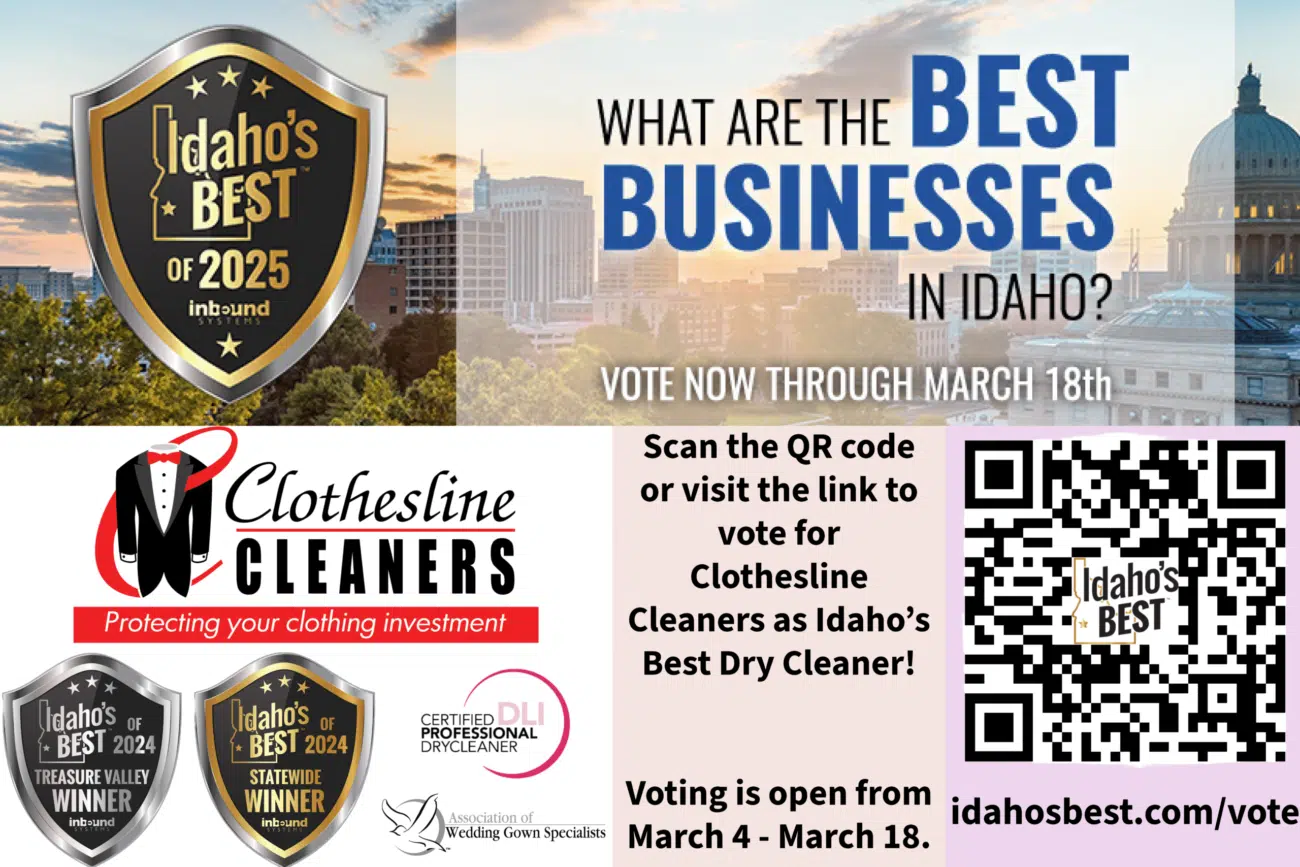
Its that time again to vote for the best. Clothesline Cleaners takes pride in being the best. We hope you will vote for us this year. It is our goal to be the best every day, whenever we fall short, we focus on how to improve our operations such that it never happens again. Perfect, top-notch service every time is our focus.
There’s nothing that screams success like a man in a well-fitting suit. But a nice suit can cost hundreds of dollars (if not more!), so it’s extremely important to invest yourself in properly wearing and caring for this unique part of your wardrobe. That care starts with some simple tools and tips that can save lots of time and money, while ensuring that you’re always looking crisp and clean in your suit.
Proper Hanger
A suit is an investment that should be treated with great care. As such, simple wire and plastic coat hangers will not do for storage. These types of hangers were not designed for the weight and long-term well-being of a suit. A proper suit hanger will help maintain the shape of the jacket by keeping shoulders straight and aligned, while providing a space to hang the suit pants inside the jacket. This prevents sagging and wrinkles, as well as protecting against any awkward fabric stretching or bunching. We suggest considering a wood hanger with wide shoulders for best support. If you tend to remove your jacket during the day and sling it over a chair, you might also consider leaving a nice hanger at the office.
Suit Brush
A suit brush is a vital tool for prolonging the life of any suit. After each wear, be sure to thoroughly brush the suit fabric to remove leftover dust, dirt, skin, and other particles that may have gathered on the material throughout the day. These often unseen particles can be pressed into the fabric if not brushed away, eventually wearing down fibers and resulting in the deterioration of your suit. A lint roller can help with this task, but it’s not an effective substitute for a good suit brush. It’s important to ensure that you’re using a proper suit brush to prevent straining the fabric. Avoid anything with overly coarse bristles that may damage the material. We advise using a brush made from animal hair for best results. Remember to ALWAYS brush in a downward motion to avoid damaging the suit material.
Image Courtesy of Bed Bath and Beyond
Fabric Suit Bag
While your suit may have come with a plastic or vinyl suit bag, we encourage you to consider a higher quality fabric suit bag. This may be more expensive, but you’ll reap the reward through a longer lifespan for your suit. A nice fabric bag allows your suit to “breathe” more effectively by not clinging to the materials, as well as preventing wrinkles, dust, and moths. Storing your suit inside a fabric suit bag will also ward off any moisture that may have been trapped during use, but we suggest waiting a day after wearing before placing the suit inside the bag for storage. Lastly, make sure to give the suit (and bag) plenty of hanging space to allow air to reach it on all sides.
How often should I dry clean my suit?
We typically suggest dry cleaning a suit after you’ve worn it four to five times. This obviously depends upon your natural tendency to sweat, as well as whether you’ve encountered strong odors, such as smoke, seafood, garlic, or experienced a spill or stain. We suggest avoiding most DIY cleaning methods, so if there’s ever a doubt in your mind as to whether it’s time for dry cleaning, bring it by your trusted cleaners. Remember, a suit is an investment that’s worth caring for properly.
If you’re located in the Treasure Valley, Clothesline Cleaners has two locations to serve your dry cleaning needs. Our certified experts are capable of handling any cleaning scenario and we’re ready to serve you. If you simply need an alteration, restoration, or preservation, we’re happy to provide those services as well. Stop by and see us today!
A SUIT CAN MAKE A DIFFERENCE
We’re accepting donations of new and slightly-used Men’s Suit Items for our Men’s Suit Drive throughout the month of November, so stop by any Clothesline Cleaners location to give today. All donations help to support the Boise Rescue Mission Ministries.
When dressing on a budget, a common tactic is to simply purchase an off-the-rack suit with the intention of having it adjusted by a tailor for that custom fit. While this can be a great money-saving measure, there are certain adjustments that even the most talented tailor can’t make. We wanted to take a few minutes to explain a bit more about fitting a suit and the role a tailor can play in preparing you to look your very best.
When you try on a suit, you’re looking for a good fit in what tailors call your “natural stance.” That means standing up straight – preferably in the kind of dress shoes you’ll be wearing with your suits – relaxing your arms at your side. If the suit doesn’t fit well in this stance, it’s not going to move comfortably with your body either.
The Shoulder
A well-fitted shoulder lies flat. The seam on top of the shoulder should be the same length as the bone under it, and should meet the sleeve of the suit right where your arm meets your shoulder.
If the seam that connects the sleeve to the jacket is hiked up along your shoulder bone, or dangling down on your upper bicep, you’ll see “ripple effects” that create lumps or wrinkles on the sleeve and the top of the jacket.
KEY:
Shoulders are one of the hardest parts of a jacket to adjust after construction, so don’t buy a piece with an ill-fitted shoulder. Odds are you’ll never be able to get it quite right with post-purchase alterations.
The Seat
The back of your trousers should lie loosely against your underwear, without pulling tight against your backside or draping loosely down your thighs.
You can spot a bad fit in the seat when there are horizontal wrinkles just under the buttocks (caused by too tight of a fit), or by loose, U-shaped sags on the backs of the thighs (caused by too loose of a fit).
KEY:
A tailor can “take in” a seat to make it tighter in the back without too much difficulty, but there’s a limit to how far he or she can go. If the seat is far too loose to begin with, it’s often not possible to adjust the fit without pulling the pockets out of place. Most pant seats cannot be “let out” very far to create a looser fit, so err on the side of too loose rather than too tight.
Trouser Break
The “break” is the small wrinkle caused when the top of your shoe stops your trouser cuff from falling to its full length. This should be a small, subtle feature. One horizontal dimple or crease is ideal. This is one of the easiest adjustments to make, so you can rely on making some changes here if you need to.
KEY:
The cuff should indeed rest on the top of your shoe — there needs to be contact — but it shouldn’t do much more than that. The trouser can fall a touch longer in the back than in front, so long as it’s still above the heel of the shoe (the actual heel, not just the back of the shoe).
The Jacket Closure
When you are wearing a suit and standing, you should have the jacket buttoned. This means that part of the fitting process is checking how the front of the jacket closes over your body while buttoned.
Close a single-breasted jacket with only one button clasped while you’re testing the fit, even if it’s a three-button jacket. You’re looking to see if the two sides meet neatly without the lapels hanging forward off your body (too loose) or the lower edges of the jacket flaring out like a skirt (too tight).
The button should close without strain, and there should be no wrinkles radiating out from the closure. A little bit of an opening at the bottom of the suit is fine, but the two halves beneath the button shouldn’t pull apart so far that you can see the shirt above your trousers. (Ideally, you shouldn’t see any, though a bit is socially acceptable, especially when you move.)
KEY:
Taking in or letting out the waist to help the jacket close more comfortably is not a difficult adjustment, but it’s one with limits. If the jacket closure looks really bad unaltered, it’s probably due to problems beyond the waist measurement, and you should be looking for a different jacket rather than planning on getting that one altered.
Jacket Sleeve Length
“A half-inch of linen” is a good, old-fashioned guideline — about half an inch of the shirt cuff should be visible beyond the jacket cuff.
That said, it’s a general guideline, and you don’t need to get too obsessive about this factor. What you do need to be sure of is that the seam where the shirt cuff joins the shirt sleeve is never visible. Similarly, the jacket sleeve should never hide the shirt sleeve entirely.
KEY:
Sleeve length is a very easy adjustment for a tailor to make, so get the best sleeve length you can (erring on the side of too long if possible) and then have it adjusted to fit.
Jacket Length
A good suit or sports jacket should fall past the waist and drape over the top of the curve formed by the buttocks. An ideal fit will cover a man down to the point where his butt starts to curve back inward, and stop there.
The hands are also a good marker here, and this is why it’s important to have your arms relaxed in your natural stance. The hem of the jacket should hit right at or just past where the fingers meet the palm.
KEY:
If the hem of the jacket is sitting on top of the butt, with a small little flare in the back, it’s too short. If it falls past the bottom entirely, longer than the arms, it’s too long. The hem can be adjusted upward without trouble, but if you go too far the front pockets start to look out of proportion.
Jacket Collar
Your jacket collar should rest against your shirt collar, which in turn should rest against the back of your neck. All of these should touch lightly together, without significant gaps in between.
If the collar is too loose, it’s very easy to spot — there will be a gap where it’s flopping back off your neck.
A tight collar is a little harder to spot on a jacket, since (unlike a shirt collar) it’s almost all in the back. A tight collar will create bunching and folds just beneath it, and often wrinkles the shirt collar underneath.
Bad collar fit could just mean the neck size is wrong for you, but it’s often caused by a larger fit issue: bad shoulder sizing, a back panel that’s too small for you, or even a jacket that’s constructed with more of a forward or backward tilt than your neutral stance.
KEY:
Since these adjustments cost time and money to fix, this is an important area to get right when your purchase. Look for as good of a fit in the original jacket collar as you can find.
Four “Bad Fit” Warnings
There are a couple problems that are major warning signs. A suit with these “bad fit” signs is one that you probably won’t ever be able to adjust to a really good fit. Unfortunately, most of these are caused by the core structure of the suit — and that means that your body just isn’t a good match for the suit or jacket.
If you can’t afford a made to order suit, an adjusted off-the-rack suit can work. You do have to start with a good fit, or you will never get the results you want. Unless you want to pay for alterations, be careful buying any jacket that’s showing these serious warning signs:
The “X-Shaped Button Strain”
If you can see wrinkled lines radiating outward from your jacket button when you close the jacket, it’s too tight and will need adjustment.
Front button strain is indicative of a bad fit in the torso, and it can go beyond just the waist size — you’re probably straining at the shoulders or in the back, too. It also means the button is going to be prone to popping off.
Shoulder Divots & Upper Arm Wrinkles
If the sleeve of the jacket seems to dip in slightly just under the shoulder, and then flare back out again, the shoulders are too big. What you’re seeing is the shoulder padding protruding beyond your arm, and the cloth of the sleeve tucking back in underneath it.
You can also get those wrinkles if you’ve got a somewhat slouched stance and the jacket is stiffly-constructed for a more upright posture. In either case you’ll need to get a smaller size, so that the seam where the shoulder meets the sleeve matches up with your body’s shoulder.
Shoulder Wrinkles — a.k.a Top Rumpling
If you’re getting noticeable bunching on top of your shoulder, rather than on the upper sleeve, the jacket is too large in the shoulders.
This can be a simple length problem, but most likely it’s that the interior space is too large — your shoulders aren’t broad enough, front to back, to fill out the jacket. Try a slimmer fit, or a smaller size.
Twisted Sleeves — a.k.a Bad Sleeve Pitch
Faint spiraling wrinkles on the outside of the sleeve occur when the angle of your arm in its natural stance doesn’t match the angle that the sleeve was constructed with. The result is a sleeve that looks slightly twisted even when your arms are hanging at your sides.
A tailor can theoretically remove the sleeves and reattach them at a slightly different angle, but it’s not a simple or a cheap fix. Generally speaking, you can consider this one a deal-breaker.
Always remember, if you need any of your suits adjusted or would like a professional opinion, stop by any Clothesline Cleaners location. Our professional Tailors and Seamstresses would love to help you look your best. And when it’s time to clean your perfect suit, Clothesline Cleaners can help with that as well.
The age-old question: “How Often Should I Replace My Pillow?” has been baffling people for decades – and we’ve done our best to answer it for you.
As humans, we develop routines for cleaning and maintaining almost everything we use or encounter everyday. From our car to our skis to our smartphones, we regularly ensure that our favorite, most useful objects are in good working condition. This is not always the case with the comfy materials we snuggle into every night. In fact, it seems that some of us almost forget that we drool, cough, snot, and sweat on our pillows and comforters each and every night. Believe it or not, this results in some well-used and very dirty objects. But the question has confounded people for years: How often should I replace my pillows?
Over the last several years, the question of how often to replace pillows has been complicated by the appearance of a large number of synthetic pillow varieties. Whether it’s memory foam, latex foam, synthetic fibers, or good ol’ goose down, each pillow has a lifetime that depends on its use and material construction. While this seems complex, it is still possible to develop general guidelines for the wear and use of your pillows. We’ve outlined some of the figures below…
Memory Foam – 18 to 36 months
Latex Foam – 18 to 36 months
Goose Down – 12 to 24 months
Duck Down – 12 to 18 months
Turkey/Duck Feathers – 6 to 12 months
Synthetic Fill – 6 to 12 months
**There are many other options, but we’ve chosen to focus on the most widely-used materials. And remember, these are only general guidelines – not guaranteed rules of thumb.
Image courtesy of Astitchmatism
Still wondering whether it’s time for a change? There are a few simple ways to test whether your pillow has reached the end of its useable life. Just keep in mind that these questions may not apply to all foam-style pillows. First, ask yourself:
Is the fill inside my pillow lumpy? Does it look bumpy?
Do I have to bunch up or fluff my pillow to get the support I need?
If I fold my pillow in half, does it stay folded or regain its shape?
Do I suffer allergies? Or, wake up with a dry/sore throat or runny nose?
The correct answers should be pretty obvious, so if you find that your pillow is lumpy/bumpy, needs to be fluffed/bunched for support, fails to regain its shape when you fold it, and/or aggravates your allergies, you may be in need of a new pillow or two.
Replacing good pillows can be an incredibly expensive endeavor. That’s not to mention the emotional devastation of having to part ways with your favorite pillow. But if it’s more than six months old, your pillow is likely filled with dead skin cells, body oils, germs, and dust mites (just to name a few things).
But, there’s good news!… PILLOW RENOVATION
Sleeping beauty in her bedroom
If your pillows fall into the down or feather category, it’s very likely that our experts at Clothesline Cleaners can help. We offer full pillow cleaning and renovation to all our valued customers – and it offers excellent savings for keeping, washing, and refilling your old pillows. Using a unique pillow renovation process, we first remove the old ticking (fabric outer layer) and replace it with new father-proof, down-proof fabric. The feathers are removed from the interior of the pillow and blown into an amazing machine that agitates them to fluff them back up and remove all dirt and other grime. The feathers are then sanitized using ultraviolet light and additional feathers may be added to return your pillow to like-new condition. When this process is all done, your pillow is bagged and returned to you in ready-for-snoozing condition.
If you’re interested in this process or have any questions for one of our experts, feel free to contact us today – or simply drop your pillows by any Clothesline Cleaners location for service.